Images to Video making php script using FFMPEG

Hi Geeks,

This Article is based on

Images to Video making php script using FFMPEG

,  So I am providing you the complete steps to setup the FFMPEG in windows and linux environment.

FFMPEG is very good Extension for php where we can process many type of operations on audio and video like

Images to video convert ,images and audio to video ,Generate Thumbnail file from video. So I have tried it on my windows system .

Steps to install FFMPEG on windows or localhost:

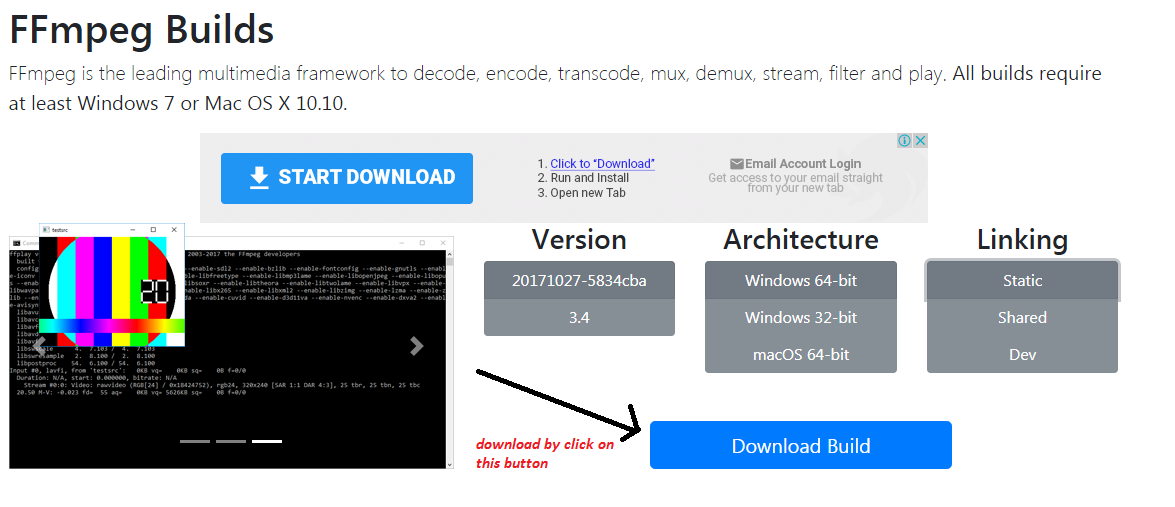
Step 1: Download the Static build for windows from following page

http://ffmpeg.zeranoe.com/builds/

there will be a button for download as in the screenshotdownload_ffmpeg


Step 2: Install prerequisite extensions

Before making any php script please make available the GD2 Library from your php.ini by just uncommenting following lines(removing semicolons from start of these lines

;extension=php_gd.dll
;extension=php_gd2.dll

Step 3: Extract the downloaded zip and Inside Bin folder you will find ffmpeg.exe

Copy that file in your project folder in htdocs Eg: slideshow_project

Now we have all images which we need to convert into video are in any folder of this projects like Images:

there should be pattern of images name like pic1.jpg,pic2.jpg as so on…

Step 4: write and execute a command for images to video conversion, following is the command

$command1="ffmpeg -f image2 -r 1/1 -i images/pic%d.jpg -vf fps=25 test1.mp4";
//command for every 1 second image change in video
exec($command1);

above command is useful with creating a slideshow video where 2 second images will change and if you want to increase slide change duration for 3 second then you need to replace 1/1 to 1/3   from above command.

Now if you want to mix audio along with images then following command will work

$command2="ffmpeg -f image2 -r 1/5 -i images/pic%d.jpg -i audio/my_recording.mp3 -vf fps=25 test2.mp4";
//command for every 5 second image change in video along with my_recording.mp3 playing in background
exec($command2);

Assuming you have my_recording.mp3 in audio folder of project

Installing FFMPEG in linux servers by following command

sudo apt-get install ffmpeg

In that case you don’t need to follow  Step 1 and Step 3

If you are having any problem then please put your comments below , I would love to help you

Implement Stripe in 3 steps using php

Hi Geeks,
This Article is focused on Implement Stripe in 3 steps using php, where you can easily accept payments through stripe by using this code. the stripe checkout.js
is used here with server side code also.

Step 1: Create a product list page named index.php with following code:

<!DOCTYPE html>
<html>
<head>
 
  <meta name="author" content="jeetendra singh">
	<title>Digital cart demo with Stripe checkout</title>
   	<meta name="description" content="stripe product listing here">

<link rel="stylesheet" href="https://maxcdn.bootstrapcdn.com/bootstrap/3.3.5/css/bootstrap.min.css" >
<link href="https://maxcdn.bootstrapcdn.com/font-awesome/4.3.0/css/font-awesome.min.css" rel="stylesheet">
<style>
body{
    margin-top:20px;
    background:#eee;
}

.prod-info-main {
    border: 1px solid #CEEFFF;
    margin-bottom: 20px;
    margin-top: 10px;
    background: #fff;
    padding: 6px;
    -webkit-box-shadow: 0 1px 4px 0 rgba(21,180,255,0.5);
    box-shadow: 0 1px 1px 0 rgba(21,180,255,0.5);
}

.prod-info-main .product-image {
    background-color: #EBF8FE;
    display: block;
    min-height: 238px;
    overflow: hidden;
    position: relative;
    border: 1px solid #CEEFFF;
    padding-top: 40px;
}

.prod-info-main .product-deatil {
    border-bottom: 1px solid #dfe5e9;
    padding-bottom: 17px;
    padding-left: 16px;
    padding-top: 16px;
    position: relative;
    background: #fff
}

.product-content .product-deatil h5 a {
    color: #2f383d;
    font-size: 15px;
    line-height: 19px;
    text-decoration: none;
    padding-left: 0;
    margin-left: 0
}

.prod-info-main .product-deatil h5 a span {
    color: #9aa7af;
    display: block;
    font-size: 13px
}

.prod-info-main .product-deatil span.tag1 {
    border-radius: 50%;
    color: #fff;
    font-size: 15px;
    height: 50px;
    padding: 13px 0;
    position: absolute;
    right: 10px;
    text-align: center;
    top: 10px;
    width: 50px
}

.prod-info-main .product-deatil span.sale {
    background-color: #21c2f8
}

.prod-info-main .product-deatil span.discount {
    background-color: #71e134
}

.prod-info-main .product-deatil span.hot {
    background-color: #fa9442
}

.prod-info-main .description {
    font-size: 12.5px;
    line-height: 20px;
    padding: 10px 14px 16px 19px;
    background: #fff
}

.prod-info-main .product-info {
    padding: 11px 19px 10px 20px
}

.prod-info-main .product-info a.add-to-cart {
    color: #2f383d;
    font-size: 13px;
    padding-left: 16px
}

.prod-info-main name.a {
    padding: 5px 10px;
    margin-left: 16px
}

.product-info.smart-form .btn {
    padding: 6px 12px;
    margin-left: 12px;
    margin-top: -10px
}

.load-more-btn {
    background-color: #21c2f8;
    border-bottom: 2px solid #037ca5;
    border-radius: 2px;
    border-top: 2px solid #0cf;
    margin-top: 20px;
    padding: 9px 0;
    width: 100%
}

.product-block .product-deatil p.price-container span,
.prod-info-main .product-deatil p.price-container span,
.shipping table tbody tr td p.price-container span,
.shopping-items table tbody tr td p.price-container span {
    color: #21c2f8;
    font-family: Lato, sans-serif;
    font-size: 24px;
    line-height: 20px
}

.product-info.smart-form .rating label {
    margin-top:15px;
    
}

.prod-wrap .product-image span.tag2 {
    position: absolute;
    top: 10px;
    right: 10px;
    width: 36px;
    height: 36px;
    border-radius: 50%;
    padding: 10px 0;
    color: #fff;
    font-size: 11px;
    text-align: center
}

.prod-wrap .product-image span.tag3 {
    position: absolute;
    top: 10px;
    right: 20px;
    width: 60px;
    height: 36px;
    border-radius: 50%;
    padding: 10px 0;
    color: #fff;
    font-size: 11px;
    text-align: center
}

.prod-wrap .product-image span.sale {
    background-color: #57889c;
}

.prod-wrap .product-image span.hot {
    background-color: #a90329;
}

.prod-wrap .product-image span.special {
    background-color: #3B6764;
}
.shop-btn {
    position: relative
}

.shop-btn>span {
    background: #a90329;
    display: inline-block;
    font-size: 10px;
    box-shadow: inset 1px 1px 0 rgba(0, 0, 0, .1), inset 0 -1px 0 rgba(0, 0, 0, .07);
    font-weight: 700;
    border-radius: 50%;
    padding: 2px 4px 3px!important;
    text-align: center;
    line-height: normal;
    width: 19px;
    top: -7px;
    left: -7px
}

.product-deatil hr {
    padding: 0 0 5px!important
}

.product-deatil .glyphicon {
    color: #3276b1
}

.product-deatil .product-image {
    border-right: 0px solid #fff !important
}

.product-deatil .name {
    margin-top: 0;
    margin-bottom: 0
}

.product-deatil .name small {
    display: block
}

.product-deatil .name a {
    margin-left: 0
}

.product-deatil .price-container {
    font-size: 24px;
    margin: 0;
    font-weight: 300;
    
}

.product-deatil .price-container small {
    font-size: 12px;
    
}

.product-deatil .fa-2x {
    font-size: 16px!important
}

.product-deatil .fa-2x>h5 {
    font-size: 12px;
    margin: 0
}

.product-deatil .fa-2x+a,
.product-deatil .fa-2x+a+a {
    font-size: 13px
}

.product-deatil .certified {
    margin-top: 10px
}

.product-deatil .certified ul {
    padding-left: 0
}

.product-deatil .certified ul li:not(first-child) {
    margin-left: -3px
}

.product-deatil .certified ul li {
    display: inline-block;
    background-color: #f9f9f9;
    padding: 13px 19px
}

.product-deatil .certified ul li:first-child {
    border-right: none
}

.product-deatil .certified ul li a {
    text-align: left;
    font-size: 12px;
    color: #6d7a83;
    line-height: 16px;
    text-decoration: none
}

.product-deatil .certified ul li a span {
    display: block;
    color: #21c2f8;
    font-size: 13px;
    font-weight: 700;
    text-align: center
}

.product-deatil .message-text {
    width: calc(100% - 70px)
}

@media only screen and (min-width:1024px) {
    .prod-info-main div[class*=col-md-4] {
        padding-right: 0
    }
    .prod-info-main div[class*=col-md-8] {
        padding: 0 13px 0 0
    }
    .prod-wrap div[class*=col-md-5] {
        padding-right: 0
    }
    .prod-wrap div[class*=col-md-7] {
        padding: 0 13px 0 0
    }
    .prod-info-main .product-image {
        border-right: 1px solid #dfe5e9
    }
    .prod-info-main .product-info {
        position: relative
    }
}
</style>

</head>

<body>
<div class="container">
<div class="col-xs-12 col-md-6">
	<!-- First product box start here-->
	<div class="prod-info-main prod-wrap clearfix">
		<div class="row">
				<div class="col-md-5 col-sm-12 col-xs-12">
					<div class="product-image"> 
						<img src="https://lorempixel.com/194/228/sports/" class="img-responsive"> 
						<span class="tag2 hot">
							HOT
						</span> 
					</div>
				</div>
				<div class="col-md-7 col-sm-12 col-xs-12">
				<div class="product-deatil">
						<h5 class="name">
							<a class="title" href="javascript:void(0)">
								Sports Dress
							</a>
							<a class="category"  href="javascript:void(0)">
								<span>Sports</span>
							</a>                            

						</h5>
						<p class="price-container">
							$<span class="price" >199</span>
						</p>
						<span class="tag1"></span> 
				</div>
				<div class="description">
					<p class="desc">this is my product desc </p>
				</div>
				<div class="product-info smart-form">
					<div class="row">
						<div class="col-md-12"> 
							<a href="javascript:void(0);" class="btn btn-danger stripe_pay">Buy Now</a>
                            
						</div>
						<div class="col-md-12">
							<div class="rating">Rating:
								<label for="stars-rating-5"><i class="fa fa-star text-danger"></i></label>
								<label for="stars-rating-4"><i class="fa fa-star text-danger"></i></label>
								<label for="stars-rating-3"><i class="fa fa-star text-danger"></i></label>
								<label for="stars-rating-2"><i class="fa fa-star text-warning"></i></label>
								<label for="stars-rating-1"><i class="fa fa-star text-warning"></i></label>
							</div>
						</div>
					</div>
				</div>
			</div>
		</div>
	</div>
	<!-- end product -->
</div>
<div class="col-xs-12 col-md-6">
	<!-- First product box start here-->
	<div class="prod-info-main prod-wrap clearfix">
		<div class="row">
				<div class="col-md-5 col-sm-12 col-xs-12">
					<div class="product-image"> 
						<img src="https://lorempixel.com/194/228/nature/" alt="194x228" class="img-responsive"> 
						<span class="tag2 hot">
							HOT
						</span> 
					</div>
				</div>
				<div class="col-md-7 col-sm-12 col-xs-12">
				<div class="product-deatil">
						<h5 class="name">
							<a class="title" href="javascript:void(0)">
								  Travel Natural places <span class="category" >Tours</span>
							</a>
						</h5>
						<p class="price-container">
							$<span class="price" >5000</span>
						</p>
						<span class="tag1"></span> 
				</div>
				<div class="description">
					<p class="desc">this is my product desc </p>
				</div>
				<div class="product-info smart-form">
					<div class="row">
						<div class="col-md-12"> 
							<a href="javascript:void(0);" class="btn btn-danger stripe_pay">Buy Now</a>
                            
						</div>
						<div class="col-md-12">
							<div class="rating">Rating:
								<label for="stars-rating-5"><i class="fa fa-star text-danger"></i></label>
								<label for="stars-rating-4"><i class="fa fa-star text-danger"></i></label>
								<label for="stars-rating-3"><i class="fa fa-star text-danger"></i></label>
								<label for="stars-rating-2"><i class="fa fa-star text-warning"></i></label>
								<label for="stars-rating-1"><i class="fa fa-star text-warning"></i></label>
							</div>
						</div>
					</div>
				</div>
			</div>
		</div>
	</div>
	<!-- end product -->
</div>
<div class="col-xs-12 col-md-6">
<!-- First product box start here-->
	<div class="prod-info-main prod-wrap clearfix">
		<div class="row">
				<div class="col-md-5 col-sm-12 col-xs-12">
					<div class="product-image"> 
						<img src="https://lorempixel.com/194/228/food/" alt="194x228" class="img-responsive"> 
						<span class="tag3 special">
							Special
						</span> 
					</div>
				</div>
				<div class="col-md-7 col-sm-12 col-xs-12">
				<div class="product-deatil">
						<h5 class="name">
							<a class="title"  href="javascript:void(0)">
								Free Food Delivery<span class="category" >Food</span>
							</a>
						</h5>
						<p class="price-container">
							$<span class="price"  >50</span>
						</p>
						<span class="tag1"></span> 
				</div>
				<div class="description">
					<p class="desc">this is my product desc </p>
				</div>
				<div class="product-info smart-form">
					<div class="row">
						<div class="col-md-12"> 
							<a href="javascript:void(0);" class="btn btn-danger stripe_pay">Buy Now</a>
                            
						</div>
						<div class="col-md-12">
							<div class="rating">Rating:
								<label for="stars-rating-5"><i class="fa fa-star text-danger"></i></label>
								<label for="stars-rating-4"><i class="fa fa-star text-danger"></i></label>
								<label for="stars-rating-3"><i class="fa fa-star text-danger"></i></label>
								<label for="stars-rating-2"><i class="fa fa-star text-warning"></i></label>
								<label for="stars-rating-1"><i class="fa fa-star text-warning"></i></label>
							</div>
						</div>
					</div>
				</div>
			</div>
		</div>
	</div>
	<!-- end product -->
</div>
<div class="col-xs-12 col-md-6">
	<!-- First product box start here-->
	<div class="prod-info-main prod-wrap clearfix">
		<div class="row">
				<div class="col-md-5 col-sm-12 col-xs-12">
					<div class="product-image"> 
						<img src="https://lorempixel.com/194/228/nightlife/" alt="194x228" class="img-responsive"> 
						<span class="tag2 sale">
							SALE
						</span> 
					</div>
				</div>
				<div class="col-md-7 col-sm-12 col-xs-12">
				<div class="product-deatil">
						<h5 class="name">
							<a class="title" href="javascript:void(0)">
								Bar & Pubs <span class="category" >Nightlife</span>
							</a>
						</h5>
						<p class="price-container">
							$<span class="price" >1000</span>
						</p>
						<span class="tag1"></span> 
				</div>
				<div class="description">
					<p class="desc">this is my product desc </p>
				</div>
				<div class="product-info smart-form">
					<div class="row">
						<div class="col-md-12"> 
							<a href="javascript:void(0);" class="btn btn-danger stripe_pay">Buy Now</a>
                            
						</div>
						<div class="col-md-12">
							<div class="rating">Rating:
								<label for="stars-rating-5"><i class="fa fa-star text-danger"></i></label>
								<label for="stars-rating-4"><i class="fa fa-star text-danger"></i></label>
								<label for="stars-rating-3"><i class="fa fa-star text-danger"></i></label>
								<label for="stars-rating-2"><i class="fa fa-star text-warning"></i></label>
								<label for="stars-rating-1"><i class="fa fa-star text-warning"></i></label>
							</div>
						</div>
					</div>
				</div>
			</div>
		</div>
	</div>
	<!-- end product -->


</div>


<div class="col-xs-12 col-md-6">
	<!-- First product box start here-->
	<div class="prod-info-main prod-wrap clearfix">
		<div class="row">
				<div class="col-md-5 col-sm-12 col-xs-12">
					<div class="product-image"> 
						<img src="https://lorempixel.com/194/228/fashion/" alt="194x228" class="img-responsive"> 
						<span class="tag2 sale">
							SALE
						</span> 
					</div>
				</div>
				<div class="col-md-7 col-sm-12 col-xs-12">
				<div class="product-deatil">
						<h5 class="name">
							<a class="title"  href="javascript:void(0)">
								Fashion And Style <span class="category" >Fashion</span>
							</a>
						</h5>
						<p class="price-container">
							$<span class="price" >1000</span>
						</p>
						<span class="tag1"></span> 
				</div>
				<div class="description">
					<p class="desc">this is my product desc </p>
				</div>
				<div class="product-info smart-form">
					<div class="row">
						<div class="col-md-12"> 
							<a href="javascript:void(0);" class="btn btn-danger stripe_pay">Buy Now</a>
                            
						</div>
						<div class="col-md-12">
							<div class="rating">Rating:
								<label for="stars-rating-5"><i class="fa fa-star text-danger"></i></label>
								<label for="stars-rating-4"><i class="fa fa-star text-danger"></i></label>
								<label for="stars-rating-3"><i class="fa fa-star text-danger"></i></label>
								<label for="stars-rating-2"><i class="fa fa-star text-warning"></i></label>
								<label for="stars-rating-1"><i class="fa fa-star text-warning"></i></label>
							</div>
						</div>
					</div>
				</div>
			</div>
		</div>
	</div>
	<!-- end product -->


</div>

<div class="col-xs-12 col-md-6">
	<!-- First product box start here-->
	<div class="prod-info-main prod-wrap clearfix">
		<div class="row">
				<div class="col-md-5 col-sm-12 col-xs-12">
					<div class="product-image"> 
						<img src="https://lorempixel.com/194/228/business/" alt="194x228" class="img-responsive"> 
						<span class="tag2 sale">
							SALE
						</span> 
					</div>
				</div>
				<div class="col-md-7 col-sm-12 col-xs-12">
				<div class="product-deatil">
						<h5 class="name">
							<a class="title"  href="javascript:void(0)">
								Business Working Style <span class="category" >Business</span>
							</a>
						</h5>
						<p class="price-container">
							$<span class="price" >1000</span>
						</p>
						<span class="tag1"></span> 
				</div>
				<div class="description">
					<p class="desc">this is my product desc </p>
				</div>
				<div class="product-info smart-form">
					<div class="row">
						<div class="col-md-12"> 
							<a href="javascript:void(0);" class="btn btn-danger stripe_pay">Buy Now</a>
                            
						</div>
						<div class="col-md-12">
							<div class="rating">Rating:
								<label for="stars-rating-5"><i class="fa fa-star text-danger"></i></label>
								<label for="stars-rating-4"><i class="fa fa-star text-danger"></i></label>
								<label for="stars-rating-3"><i class="fa fa-star text-danger"></i></label>
								<label for="stars-rating-2"><i class="fa fa-star text-warning"></i></label>
								<label for="stars-rating-1"><i class="fa fa-star text-warning"></i></label>
							</div>
						</div>
					</div>
				</div>
			</div>
		</div>
	</div>
	<form action="pay.php" id="pay_form" method="post">
		<input type="hidden" name="price" />
		<input type="hidden" name="title" />
		<input type="hidden" name="category" />
		<input type="hidden" name="image" />
		<input type="hidden" name="desc" />
		<input type="hidden" name="_pay_" value="1" />
	</form>
	<!-- end product -->
	<script
  src="https://code.jquery.com/jquery-1.12.4.min.js"
  integrity="sha256-ZosEbRLbNQzLpnKIkEdrPv7lOy9C27hHQ+Xp8a4MxAQ="
  crossorigin="anonymous"></script>
	 <script>
	 $(document).ready(function(){
		 
		$(".stripe_pay").click(function(){
	    var obj_prd=$(this).parents('.prod-info-main');
		
		var price=obj_prd.find('.price').text();
		var title=obj_prd.find('.title').text();
		var desc=obj_prd.find('.desc').text();
		var category=obj_prd.find('.category').text();
		var img=obj_prd.find('.product-image img').attr('src');
	 console.log(img)
	 
		 
		 $("input[name='price']").val(price);
		 $("input[name='title']").val(title);
		 $("input[name='desc']").val(desc);
		 $("input[name='category']").val(category);
		 $("input[name='image']").val(img);
	
	      $("#pay_form").submit();

		});		
		 
	 });
	 
	 </script>


</div>
</div>
</body>
</html>

Output Screen for this will look like this:

1

Note: you can get products from database also,but here for demonstration i am showing these static.

Step 2: Create a Checkout Page with name pay.php, here you need to replace the stripe public key mention in the comment also.

<html lang="en">

<head>
    <meta charset="utf-8">
    <meta http-equiv="X-UA-Compatible" content="IE=edge">
    <meta name="viewport" content="width=device-width, initial-scale=1">
    <meta name="author" content="jeetendra singh">
	<title>Stripe Checkout demo</title>
   	<meta name="description" content="stripe checkout demo here">

    </head>
	<body>
<?php if(isset($_POST['_pay_'])) {?>
 <h1>Product title is :<?php echo $_POST['title']; ?></h1>
 <h2>Category is : <?php echo $_POST['category']; ?></h2>
 <h3>Description is :<?php echo $_POST['desc']; ?></h3>
 <h4>Amount is :$<?php echo $_POST['price']; ?></h4>
 <p><img src="<?php echo $_POST['image']; ?>" /></p>
 
<form action="charge.php" method="POST">
<input type="hidden" name="stripePrice" value="<?php echo $_POST['price']*100;//stripe takes in cents ?>" />
<!--replace stripe public key in data-key attr in script tag-->
		  <script
			src="https://checkout.stripe.com/checkout.js" class="stripe-button"
			data-key="pk_test_6pRNASCoBOKtIshFeQd4XMUh"
			data-label="Pay with Stripe"
			data-amount="<?php echo $_POST['price']*100; ?>"
			data-name="<?php echo $_POST['title']." from ".$_POST['category']; ?>"
			data-description="<?php echo $_POST['desc']; ?>"
			data-image="<?php echo $_POST['image']; ?>"
			data-locale="auto"
			data-zip-code="true">
		  </script>
		 </form>
<?php }?>
</body>
</html>

Output Screen:

2

Step 3: Create a server side script for charge customer named as charge.php with following code, here you need to replace the Stripe private key mention in comment also:

<html lang="en">

<head>
    <meta charset="utf-8">
    <meta http-equiv="X-UA-Compatible" content="IE=edge">
    <meta name="viewport" content="width=device-width, initial-scale=1">
    <meta name="author" content="jeetendra singh">
   	<meta name="description" content="stripe server side code demo here">
    <title>FINAL PAYMENT STATUS- STRIPE SERVER SIDE CODE DEMO</title>
	 
</head>
<body>		
<?php
require_once('./stripe/init.php');

if(isset($_POST['stripeToken']) && $_POST['stripeToken']!=""){


	 // Set secret key
  \Stripe\Stripe::setApiKey("sk_test_g0654565464569");//replace your secreet key of stripe here

  // Get the credit card details submitted by the form
  $token = $_POST['stripeToken'];

  // Create the charge on Stripe's servers - this will charge the user's card
  try {
    $customer = \Stripe\Customer::create(array(
      'email' => $_POST['stripeEmail'],
      'source'  => $token
    ));

    $charge = \Stripe\Charge::create(array(
      "amount" => $_POST['stripePrice'],
      "currency" => "usd",
      "customer" => $customer->id
      ));

    echo "<h1 style='color:green'>PAYMENT SUCCESSFULLY DONE</h1>";


  } catch(\Stripe\Error\Card $e) {
    // The card has been declined
    echo "<h1 style='color:red'>PAYMENT FAILED!</h1>";
  }


}
?>

Output Screen:

3

Note: there should be a stripe library in the root folder you can download it from here:
https://github.com/stripe/stripe-php/archive/v4.7.0.zip
and extract it with name stripe as you can see in following screenshot

4

Still you have any problem in integrating you can directly call me and i will send you the complete working code,

you can comment here or send me a email on [email protected]

Thanks


CREATE OWN CAPTCHA FOR YOUR WEBSITE

Hi Geeks,
I am sharing you a program for creating a captcha script using php and javascript. Following are the simple steps to create captcha in php

Step 1: Create a php script named ‘captcha.php’ with following code that generate and return a captcha image.

<?php session_start();
if(isset($_SESSION['custom_captcha']))
{
unset($_SESSION['custom_captcha']); // destroy the session if already there
}
$string1="abcdefghijklmnopqrstuvwxyz";
$string2="1234567890";
$string=$string1.$string2;
$string= str_shuffle($string);
$random_text= substr($string,0,8); // change the number to change number of chars
$_SESSION['custom_captcha']=$random_text;
$im = @ImageCreate (80, 20)
or die ("Cannot Initialize new GD image stream");
$background_color = ImageColorAllocate ($im, 204, 204, 204); // Assign background color
$text_color = ImageColorAllocate ($im, 51, 51, 255); // text color is given 
ImageString($im,5,5,2,$_SESSION['custom_captcha'],$text_color); // Random string from session added 
ImagePng ($im); // image displayed
imagedestroy($im); // Memory allocation for the image is removed. 
?>

Step 2: Now create a captcha.js file and put following code in the file.

function reload()
{
img = document.getElementById("capt");
img.src="captcha.php";
}

$(document).ready(function(){

var htm='<p><img src="captcha.php" id="capt">&nbsp;<input width="30" height="30" type="image" src="reload.png" onClick="reload();"  ></p><p><input type="text" name="g-recaptcha-response"  > ';

$('#custom_captcha').html(htm);//set the captcha data in element having id > custom_captcha . you can change as your div/Element id


});

Step 3: Now we need to create a Placeholder Element inside the form as following:

<!--inside the form tag-->
<!--this custom_captcha id is used in js file,you can change in js and html both-->
<div id="custom_captcha"></div>
<!--inside the form tag-->

Step 4: Now after submitting you from validate the captcha was right or not. So in your form submit action use following code.

<?php

if(!isset($_REQUEST['g-recaptcha-response']) || empty($_POST['g-recaptcha-response']) )
{
	
	$error = "Please fill the captcha.";
	//you can use this error var later to show error message on your page
}
else
{
 	
 
	$cresponse = urlencode($_REQUEST['g-recaptcha-response']);
 
	if($cresponse!=$_SESSION['custom_captcha'])
	{
	 $error = "INVALID CAPTCHA";
	 //you can use this var to show error invalid captcha
	}
	
}

//Now if no error then do your further process//
if($errors=="")
{
  //go ahed with form submission or data manipulation
}

?>

Note 1: In which page/form you are using the capcha , there should be session start in top of the file as following:

<?php @session_start(); ?>

and also include the js file in your php page head section. jquery should be available before the captcha.js inclusion as following:

<script src="https://ajax.googleapis.com/ajax/libs/jquery/1.12.4/jquery.min.js"></script>
<script src='captcha.js'></script>

Note 2: PHP GD LIBRARY SHOULD BE INSTALLED ON YOUR SERVER.


Pagination code using php and mysql

Hi Geeks,
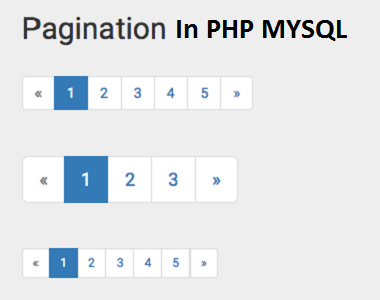
We have gone through some user requests for pagination code for php mysql project.So we have created a simple class where you can easily create pagination for any grid or listing. following are the simple steps for making a pagination system in php.

Step 1: Create a class file ‘Paginator.class.php’ in your project with following code snippet

<?php
 
class Paginator {
 
     private $_conn;
        private $_limit;
        private $_page;
        private $_query;
        private $_total;
		
	 public function __construct( $conn, $query ) {
		 
		$this->_conn = $conn;
		$this->_query = $query;
	 
		$rs= $this->_conn->query( $this->_query );
		$this->_total = $rs->num_rows;
		 
	}
	public function getData( $limit = 10, $page = 1 ) {
     
    $this->_limit   = $limit;
    $this->_page    = $page;
   
 
    if ( $this->_limit == 'all' ) {
        $query      = $this->_query;
    } else {
		$offset=( ( $this->_page - 1 ) * $this->_limit );
        $query      = $this->_query . " LIMIT " . $offset . ", $this->_limit";
    }
    $rs             = $this->_conn->query( $query );
	 
   $results=array();
    while ( $row = $rs->fetch_assoc() ) {
        $results[]  = $row;
    }
 
    $result         = new stdClass();
    $result->page   = $this->_page;
    $result->limit  = $this->_limit;
    $result->total  = $this->_total;
    $result->data   = $results;
 
    return $result;
	}
	
	public function append_existing_query_string($qstring)
	{
		if(isset($_GET))
		{
			foreach($_GET as $k=>$v)
			{
				$qstring.="&".$k."=".$v;
			}
		}
		return $qstring;
	}
	
	public function createLinks( $links, $list_class ) {
    if ( $this->_limit == 'all' ) {
        return '';
    }
 
    $last       = ceil( $this->_total / $this->_limit );
 
    $start      = ( ( $this->_page - $links ) > 0 ) ? $this->_page - $links : 1;
    $end        = ( ( $this->_page + $links ) < $last ) ? $this->_page + $links : $last;
 
    $html       = '<ul class="' . $list_class . '">';
 
    $class      = ( $this->_page == 1 ) ? "disabled" : "";
	    
	//
	$qstring='?limit=' . $this->_limit . '&page=' . ( $this->_page - 1 );
	$qstring=$this->append_existing_query_string($qstring);
	//
	
    $html       .= '<li class="' . $class . '"><a href="'.$qstring.'">&laquo;</a></li>';
 
    if ( $start > 1 ) {
		
		//
		$qstring='?limit=' . $this->_limit . '&page=1';
		$qstring=$this->append_existing_query_string($qstring);
		//
        $html   .= '<li><a href="'.$qstring.'">1</a></li>';
        $html   .= '<li class="disabled"><span>...</span></li>';
    }
 
    for ( $i = $start ; $i <= $end; $i++ ) {
        $class  = ( $this->_page == $i ) ? "active" : "";
		//
		$qstring='?limit=' . $this->_limit . '&page=' . $i;
		$qstring=$this->append_existing_query_string($qstring);
		//
        $html   .= '<li class="' . $class . '"><a href="'.$qstring.'">' . $i . '</a></li>';
    }
 
    if ( $end < $last ) {
        $html   .= '<li class="disabled"><span>...</span></li>';
		//
		$qstring='?limit=' . $this->_limit . '&page=' . $last;
		$qstring=$this->append_existing_query_string($qstring);
		//
        $html   .= '<li><a href="'.$qstring.'">' . $last . '</a></li>';
    }
 
    $class      = ( $this->_page == $last ) ? "disabled" : "";
	
	$qstring='?limit=' . $this->_limit . '&page=' . ( $this->_page + 1 );
	$qstring=$this->append_existing_query_string($qstring);
	
    $html       .= '<li class="' . $class . '"><a href="'.$qstring.'">&raquo;</a></li>';
 
    $html       .= '</ul><span style="float:right;color:blue">Total records : '.$this->_total.'</span>';
 
    return $html;
	}

}
?>

Step 2: Include the paging class before extracting data to show

<?php

include 'Paginator.class.php';

?>

Step 3: Now extract the data for any page as following

<?php
//create a connection to mysql
	$conn       = new mysqli('SERVER HOST NAME','MYSQL USER NAME', 'MY SQL USER PASSWORD','PROJECT DATABASE NAME' );
	
	//DEFINE LIMIT for PER PAGE now 25 is page limit
    $limit      = ( isset( $_GET['limit'] ) ) ? $_GET['limit'] : 25;
	
	//DEFAULT PAGE NUMBER if No page in url
    $page       = ( isset( $_GET['page'] ) ) ? $_GET['page'] : 1;
	
	//Number of frequency links to show at one time ; 
    $links      = ( isset( $_GET['links'] ) ) ? $_GET['links'] : 7;
   
   //your query here in query varriable
    $query  = "Select * from customers  ";
 
 //create a paging class object with connection and query parameters
    $Paginator  = new Paginator( $conn, $query );
 
 //get the results from paginator class
    $results    = $Paginator->getData( $limit, $page ); 
 ?>

Step 4 : Now we are ready with data. So just showing the data and links as following

> Show the data first and after it showing the pagination links as following:

<table class="table table-striped">
              <thead>
                <tr>
               
                  <th>Customer Id</th>
                  <th>Customer Name</th>
				  <th>Customer Email</th>
                  <th>Customer Address</th>
                 
                </tr>
              </thead>
              <tbody>
				<?php
			 
				if(isset($results) && count( $results->data ) > 0){
				 
				 for( $i = 0; $i < count( $results->data ); $i++ ) { ?>
				<tr>
                <td><?php echo $results->data[$i]['id']; ?></td>
                <td><?php echo $results->data[$i]['name']; ?></td>
                <td><?php echo $results->data[$i]['email']; ?></td>
                <td><?php echo $results->data[$i]['address']; ?></td>
               
				  
				</tr>
				<?php }
				} ?>
               
              </tbody>
            </table>

> Show the paging links after the data

<p><?php echo $Paginator->createLinks( $links, $class="pagination"); ?></p>


form validation library in php

Hi Geeks,

Today i am sharing a generic class for

Form validation library in php

&  it also populate if form validation failed. First of all you can download the ‘form validation library in php’ by clicking on following url.

https://github.com/g10dra/form_validation_php/blob/master/class.validation.php

Now in this class you can validate the require,numeric,file-extension,match password & confirm password,validate url and other validation also.

It is having a validation with database like is_unique in mysql database where you need pass the db connection if you want to user is_unique validation.

Step 1: Include & Initialize the class in header or before your form s following:

//include the form validation class//
require 'class.validation.php'; or any of your path where you have save the class

$db_details=array();//array for db details for validation some fields like is_unique from DB.
//pass the varribale dynamic or static

$db_details['db_host']=DB_HOST;
$db_details['db_user']=DB_USER;
$db_details['db_password']=DB_PASS;
$db_details['db_name']=DB_NAME;


$validation= new validation($db_details);

//

Step 2: Create a HTML FORM

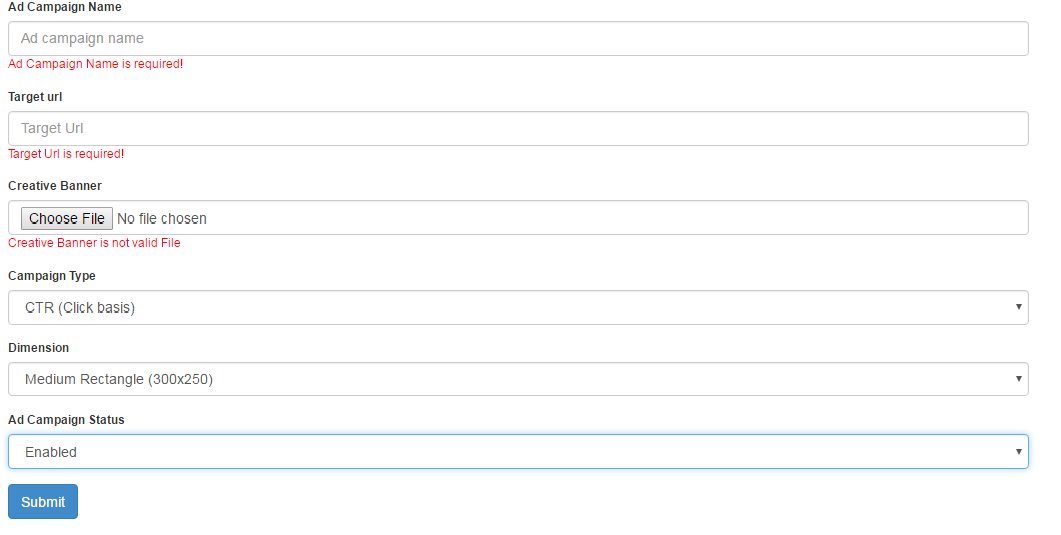
we are assuming that we have a form for add/edit ‘Advertise campaign’ form

Read the full comments in code


<div class="content-box-large">
			  				<div class="panel-heading">
					            <div class="panel-title">Add / Update Campaign</div>
					          <?php
							  //this is for getting data for edit mode
					            if(isset($_GET['id']) && $_GET['id']!="")
								{
									$query = "SELECT * from tbl_ads WHERE a_id='".$_GET['id']."' ";
									//we have user a database class for retirving the results ,you  can use your own data retrival process
									if( $database->num_rows( $query ) > 0 )
									{
										$_edited_data = $database->get_results( $query );
										$_edited_data=$_edited_data[0];
									}
									else{
										header("location:campaign.php?err=something bad happen !");
									}
								}
								else
								{
									//add time initialize the blank data in edit data varriable ,if we are add action
									$_edited_data=array();
									$_edited_data['ad_name']="";
									$_edited_data['end_url']="";
									$_edited_data['campaign_type']="";
									$_edited_data['dimension']="";
									$_edited_data['is_active']="";
								
								}
								?>
					        </div>
			  				<div class="panel-body">
			  					<form enctype="multipart/form-data" method="post">
								
								<input type="hidden" name="is_post" value="1" />
								<!-- field for detecting if form is submitted or not -->
								
								<input type="hidden" name="edit_id" value="<?php echo (isset($_GET['id']))? $_GET['id'] : "0"; ?>" />
								<!-- field for detecting if form is submitted in edit or add mode -->
								
									<fieldset>
										<div class="form-group">
											<label>Ad Campaign Name</label>
											<input value="<?php echo $validation->set_val("ad_name",$_edited_data['ad_name']); ?>"  name="ad_name" class="form-control" placeholder="Ad campaign name" type="text">
											
											<?php echo $validation->error_message("ad_name","<span style='color:red'>");
											?>
											
											<!-- 
											$validation->set_val() is having 2 parameter
											1st is a field name and second is for default value or edit mode populated value.//This method used to populate the text field value
											
											$validation->error_message() is having 2 params first is the field name and second is the opening tag of html tag where error should show in designed form,do not clode the tag it will autoclose the opened tag passed over it.
											
											-->
											
										</div>
										<div class="form-group">
											<label>Target url</label>
											<input value="<?php echo $validation->set_val("end_url",$_edited_data['end_url']); ?>"  name="end_url" class="form-control" placeholder="Target Url" type="text">
											
											<?php echo $validation->error_message("end_url","<span style='color:red'>");
											?>
											
										</div>
										<div class="form-group">
											<label>Creative Banner</label>
											<input class="form-control" name="ad_media_file" type="file" >
											
											<?php 
											if(isset($_edited_data['ad_media_file']) && $_edited_data['ad_media_file']!="")
											{
												echo '<img style="max-width:300px;height:auto" src="AD_MEDIA/'.$_edited_data['ad_media_file'].'"   />';
											}
											
											echo $validation->error_message("ad_media_file","<span style='color:red'>");
											?>
										</div>
										<div class="form-group">
											<label>Campaign Type</label>
											
											<select <?php  if(isset($_GET['id']) && $_GET['id']!=""){ echo "disabled"; } ?> name="campaign_type" class="form-control input-md">
													<option <?php echo $validation->set_select("campaign_type","1",$_edited_data['campaign_type']); ?> value="1">CTR (Click basis)</option>
													<option <?php echo $validation->set_select("campaign_type","2",$_edited_data['campaign_type']); ?> value="2">CPM (impression every 1k)</option>
												</select>
												
												<!--
												
												$validation->set_select() is having 3 params for first is field name second is 
												for seting selected=selected if value matched in failed post, and third is for seleted by default in edit mode
												-->
												
										</div>
										 
												
										</div>
										<div class="form-group">
											<label>Ad Campaign Status </label>
											
											<select  name="is_active" class="form-control input-md">
													<option <?php echo $validation->set_select("is_active","1",$_edited_data['is_active']); ?> value="1">Enabled</option>
													<option <?php echo $validation->set_select("is_active","0",$_edited_data['is_active']); ?> value="0">Disabled</option>
												</select>
												
										</div>
										
									</fieldset>
									<div>
										<button type="submit" class="btn btn-primary">
											<i class="fa fa-save"></i>
											Submit
										</button>
									</div>
								</form>
			  				</div>
			  			</div>

Step 3: Create a Table for advertise add/edit using following sql dump

CREATE TABLE IF NOT EXISTS `tbl_ads` (
  `a_id` int(11) NOT NULL AUTO_INCREMENT,
  `user_id` int(11) NOT NULL,
  `ad_name` varchar(255) NOT NULL,
  `ad_media_file` text NOT NULL,
  `end_url` tinytext NOT NULL,
  `total_impression` int(11) NOT NULL,
  `campaign_type` enum('1','2') NOT NULL COMMENT '1 for click base 2 for impression',
  `is_active` enum('0','1') NOT NULL DEFAULT '1',
  `approved` enum('0','1') NOT NULL DEFAULT '0',
  `is_delete` enum('0','1') NOT NULL DEFAULT '0',
  `added_date` datetime NOT NULL,
  `updated_date` datetime NOT NULL,
  `remark` text NOT NULL,
  PRIMARY KEY (`a_id`)
) ENGINE=InnoDB  DEFAULT CHARSET=latin1 AUTO_INCREMENT=1 ;

Step 4: Now need to post the form and recieve data and show errors, Recieve post Before the HTML form

if(isset($_POST['is_post'])) //check form is posted
{
	extract($_POST);//extract the form in its filed name vars using php function extract
	
	
	//now create a is_unique rule for ad name for AD/EDIT MOde both 
	
	if(isset($edit_id) && $edit_id!=0)//it means it is in edit mode
	{
		$is_unique_expression="tbl_ads::ad_name::a_id!=".$edit_id;
	}
	else
	{
		$is_unique_expression="tbl_ads::ad_name";
	}
	
	/*
	So for -> is_unique_expression :: First data is for `table_name`
	second is for `column_name` to match
	third is for `where_condition` in edit case or any specific requirement (optional)
	ALl are seperated with :: (double colon)
	*/
	 
	
		//validation rules 
		
		$config_validation=array(
		array('field'=>"ad_name",
		"label"=>"Ad Campaign Name",
		"rules"=>"required|is_unique[".$is_unique_expression."]",
		),
		array('field'=>"campaign_type",
		"label"=>"Campaign Type",
		"rules"=>"required",
		),
		array('field'=>"is_active",
		"label"=>"Ad Campaign Status",
		"rules"=>"required",
		),
		array('field'=>"ad_media_file",
		"label"=>"Creative Banner",
		"rules"=>"file_required|valid_file[AD_MEDIA::png,jpg,jpeg,gif]",
		),
		array('field'=>"end_url",
		"label"=>"Target Url",
		"rules"=>"required|valid_url",
		)
		);
		
		//rule names must seperated with pipe |
		/*
		rule      =>    usage
		required  =>  means must required item
		valid_url =>   used for validate a url format
		file_required => user to set must upload validation for a input type file
		valid_file => valid file passes a string for validate file time in []
		              fist is the folder name seperated with double column :: second is 
					  for extnsions seperated with comma (,)
		is_unique => used for matching value already exist in database or not for 
					both  edit and add case, in edit case we can pass the extra where case
					for self safe 
		
		
		*/
	
	
	//now pass the configuration array of fileds
	$validation->init($config_validation);
	
	
	//if form successfully submitted by passing all rules//
	if($validation->form_success==1)
	{
		
		//do whatever want to do
		if(isset($edit_id) && $edit_id!=0) //detect it is in edit mode
		{
			$ad_media_file = (isset($validation->return_array['ad_media_file']))?$validation->return_array['ad_media_file']:"";
			
			//$validation->return_array is a array set the key with file field name if file successfully posted.
			//means it set the file field name key in '$validation->return_array' with input type file name.
			//so we can get the uploaded file name by passing the file type field name in $validation->return_array like this >> $validation->return_array['ad_media_file'];
			
			
			//this is save action when we edit any item
			$date=date('Y-m-d H:i:s');
			
			$update = array(
				'ad_name' => $ad_name,
				'is_active' => $is_active,
				'dimension' => $dimension,
				'end_url' => $end_url,
				'updated_date' => $date
			);
			if($ad_media_file!="")
			{
				$update['ad_media_file'] = $ad_media_file;
			}
			//Add the WHERE clauses
			$where_clause = array(
				'a_id' => $edit_id
			);
			$updated = $database->update( 'tbl_ads', $update, $where_clause, 1 );
			if( $updated )
			{
				header('location:campaign.php?msg=Ad Campaign Updated Successfully!');
			}
		}
		else
		{ //detect that form post done for add a new campaign
			$ad_media_file = $validation->return_array['ad_media_file'];
	
			//this is add action where we add new item
			$date=date('Y-m-d H:i:s');
			$data = array(
				'ad_name' => $ad_name,
				'campaign_type' => $campaign_type,
				'user_id' => $_SESSION['user_id'],
				'is_active' => $is_active,
				'dimension' => $dimension,
				'ad_media_file' => $ad_media_file,
				'end_url' => $end_url,
				'added_date' => $date,
				'updated_date' => $date
				
			);
			
			$add_query = $database->insert( 'tbl_ads', $data );
			if( $add_query )
			{
				header('location:campaign.php?msg=Ad Campaign Added Successfully!');
			}
		}
		//do whatever want to do
	}
	else{
		
		//echo "<pre>";
		//print_r($validation->errors_array);
		//die;
		
		//$validation->errors_array is the complete array with all errors of form.
	}

	
}

Please Comment If any problem in this. I’ll assist you to use this form validation library

How to work with AngularJS as frontend and PHP MYSQL as backend

Hi Geeks,

In this tutorial you will learn that how to work with AngularJs as web frontend or in any hybrid app and get retrieve data from database using php and mysql. We have created restful webservice for return records to angular app.

Now steps for making a angularjs app with php and mysql –
Step 1) Create a database and table for fetching content from the table
Note: If you want to use existing database then select you db else create a new db with ‘news_db’ or whatever you want to take a db name.
Now Create a table named ‘news’ for getting data by following sql statement

CREATE TABLE IF NOT EXISTS `news` (
  `id` int(12) NOT NULL AUTO_INCREMENT,
  `title` varchar(255) NOT NULL,
  `permalink` varchar(255) NOT NULL,
  `details` text NOT NULL,
  `thumbnail` varchar(255) NOT NULL,
  `category_id` int(12) NOT NULL,
  `source_id` int(12) NOT NULL,
  `datetime` int(12) NOT NULL,
  `day` int(2) NOT NULL,
  `month` int(2) NOT NULL,
  `year` int(4) NOT NULL,
  `hits` int(12) NOT NULL,
  `published` int(1) NOT NULL,
  PRIMARY KEY (`id`)
) ENGINE=MyISAM  DEFAULT CHARSET=utf8 AUTO_INCREMENT=1;

Now Dump some dummy records by following insert statement:

--
-- Dumping data for table `news`
--

INSERT INTO `news` (`id`, `title`, `permalink`, `details`, `thumbnail`, `category_id`, `source_id`, `datetime`, `day`, `month`, `year`, `hits`, `published`) VALUES
(1, 'MY NEWS TITLE 1', '', 'The standard chunk of Lorem Ipsum used since the 1500s is reproduced below for those interested. Sections 1.10.32 and 1.10.33 ', '11621455015936.jpg', 1, 0, 1455015936, 9, 2, 2016, 45, 1),
(2, 'MY NEWS TITLE 2', '', 'Lorem Ipsum is simply dummy text of the printing and typesetting industry. ', '76911455015952.jpg', 2, 0, 1455015952, 9, 2, 2016, 73, 0);

Step 2) Create a file named config.php with following code

<?php
$details=array();
$details['server_host']="localhost";//server host name
$details['mysql_name']="root";//your mysql user name
$details['mysql_password']="";//your mysql user name
$details['mysql_database']="news_db";//your database name
?>

change credential according to your database and server host
Step 3) Now create a file for webservices named wsdl.php
Define Cross origin headers in this file by following code

<?php
header("Access-Control-Allow-Origin: *");
header("Content-Type: application/json; charset=UTF-8");
?>

Now code for getting data from database and provide in restful json format by following code

<?php
include 'config.php';//make the cofig file include
global $details;//make the connection vars global

if($_GET['method'] == "load_news")
{
	$conn = new mysqli($details['server_host'], $details['mysql_name'],$details['mysql_password'], $details['mysql_database']);	
	$result = $conn->query("SELECT title,details,hits FROM news");
	$data=array();
	while($rs = $result->fetch_array(MYSQLI_ASSOC)) {
		$row=array();
	   $row['title']=addslashes($rs["title"]);
	   $row['details']=addslashes($rs["details"]);
	   $row['hits']=addslashes($rs["hits"]);
	   
	   $data[]=$row;
		
	}
	$jsonData=array();
	$jsonData['records']=$data;

	$conn->close();
	echo json_encode($jsonData);

}
?>

So complete Code for wsdl.php is following

<?php
header("Access-Control-Allow-Origin: *");
header("Content-Type: application/json; charset=UTF-8");
include 'config.php';//make the cofig file include
global $details;//make the connection vars global

if($_GET['method'] == "load_news")
{
	$conn = new mysqli($details['server_host'], $details['mysql_name'],$details['mysql_password'], $details['mysql_database']);	
	$result = $conn->query("SELECT title,details,hits FROM news");
	$data=array();
	while($rs = $result->fetch_array(MYSQLI_ASSOC)) {
		$row=array();
	   $row['title']=addslashes($rs["title"]);
	   $row['details']=addslashes($rs["details"]);
	   $row['hits']=addslashes($rs["hits"]);
	   
	   $data[]=$row;
		
	}
	$jsonData=array();
	$jsonData['records']=$data;

	$conn->close();
	echo json_encode($jsonData);

}
?>

Step 4) Now Start with frontend
Step for Getting data from database using angularjs as frontend and php & mysql as backed
make a file named index.html
include the script which i have attached with this post

<script src="js/angular.1.4.8.min.js"></script>

Now make a ng-app with following html

<div ng-app="myApp" ng-controller="newsCtrl"> 

</div>

make a html table format inside the div for getting data from datasource(php/mysql restful service) as following

<div ng-app="myApp" ng-controller="newsCtrl"> 
<table border="2">
  <tr ng-repeat="x in names">
    <td>{{ x.title }}</td>
    <td>{{ x.details }}</td>
    <td>{{ x.hits }}</td>
  </tr>
</table>
</div>

Now put the script that call the restful web service and load data to the table

<script>
var app = angular.module('myApp', []);
app.controller('newsCtrl', function($scope, $http) {
    $http.get("http://localhost/angular/wsdl.php?method=load_news")
    .then(function (response) {$scope.names = response.data.records;});
});
</script>

Now complete Code for index.html

<script src="js/angular.1.4.8.min.js"></script>
<div ng-app="myApp" ng-controller="newsCtrl"> 

<table border="2">
  <tr ng-repeat="x in names">
    <td>{{ x.title }}</td>
    <td>{{ x.details }}</td>
    <td>{{ x.hits }}</td>
  </tr>
</table>

</div>

<script>
var app = angular.module('myApp', []);
app.controller('newsCtrl', function($scope, $http) {
    $http.get("http://localhost/angular/wsdl.php?method=load_news")
    .then(function (response) {$scope.names = response.data.records;});
});
</script>

Congratulations you have completed with this tutorial please provide comments for this tutorial. [viraldownloader id=146 text=’DOWNLOAD COMPLETE CODE’]

Array to Xml Conversion and Xml to Array Convert in PHP

Hi Geeks,
Today i am sharing you a code snippet for converting xml to array with attributes also and vice versa (Convert array to xml). This class is very useful to parse rss feed and to make rss feed in php programming.

In this code snippet we have made a class to convert array XML using php code and also retaining its attibues stored into array . It returns the XML in form of DOMDocument class for further manipulation. This class will throw exception if the tag name or attribute name has illegal characters.

Usage of this class:

 //convert array to xml//
		$php_array = array ();//this is your array data ,it comes from database also or you can define elements in php code also.
	    $root_node="ROOT";//root node of the xml tree like//root , data or anything you want to make super parent tag for the xml
        $xml = Array2XML::createXML($root_node, $php_array);//
        echo $xml->saveXML();
	   
	  //convert  xml to array//
		$xmlstring='';//this varribale will contain xml string
		$xml_data = Array2XML::XML_TO_ARR($xmlstring);//
        

A. Steps for Convert Array to Xml

1.Create a class named Array2XML with following code in file Array2XML.php

<?php

class Array2XML {
 
    private static $xml = null;
	private static $encoding = 'UTF-8';
 
    /**
     * Initialize the root XML node [optional]
     * @param $version
     * @param $encoding
     * @param $format_output
     */
    public static function init($version = '1.0', $encoding = 'UTF-8', $format_output = true) {
        self::$xml = new DomDocument($version, $encoding);
        self::$xml->formatOutput = $format_output;
		self::$encoding = $encoding;
    }
 
    /**
     * Convert an Array to XML
     * @param string $node_name - name of the root node to be converted
     * @param array $arr - aray to be converterd
     * @return DomDocument
     */
    public static function &createXML($node_name, $arr=array()) {
        $xml = self::getXMLRoot();
        $xml->appendChild(self::convert($node_name, $arr));
 
        self::$xml = null;    // clear the xml node in the class for 2nd time use.
        return $xml;
    }
 
    /**
     * Convert an Array to XML
     * @param string $node_name - name of the root node to be converted
     * @param array $arr - aray to be converterd
     * @return DOMNode
     */
    private static function &convert($node_name, $arr=array()) {
 
        //print_arr($node_name);
        $xml = self::getXMLRoot();
        $node = $xml->createElement($node_name);
 
        if(is_array($arr)){
            // get the attributes first.;
            if(isset($arr['@attributes'])) {
                foreach($arr['@attributes'] as $key => $value) {
                    if(!self::isValidTagName($key)) {
                        throw new Exception('[Array2XML] Illegal character in attribute name. attribute: '.$key.' in node: '.$node_name);
                    }
                    $node->setAttribute($key, self::bool2str($value));
                }
                unset($arr['@attributes']); //remove the key from the array once done.
            }
 
            // check if it has a value stored in @value, if yes store the value and return
            // else check if its directly stored as string
            if(isset($arr['@value'])) {
                $node->appendChild($xml->createTextNode(self::bool2str($arr['@value'])));
                unset($arr['@value']);    //remove the key from the array once done.
                //return from recursion, as a note with value cannot have child nodes.
                return $node;
            } else if(isset($arr['@cdata'])) {
                $node->appendChild($xml->createCDATASection(self::bool2str($arr['@cdata'])));
                unset($arr['@cdata']);    //remove the key from the array once done.
                //return from recursion, as a note with cdata cannot have child nodes.
                return $node;
            }
        }
 
        //create subnodes using recursion
        if(is_array($arr)){
            // recurse to get the node for that key
            foreach($arr as $key=>$value){
                if(!self::isValidTagName($key)) {
                    throw new Exception('[Array2XML] Illegal character in tag name. tag: '.$key.' in node: '.$node_name);
                }
                if(is_array($value) && is_numeric(key($value))) {
                    // MORE THAN ONE NODE OF ITS KIND;
                    // if the new array is numeric index, means it is array of nodes of the same kind
                    // it should follow the parent key name
                    foreach($value as $k=>$v){
                        $node->appendChild(self::convert($key, $v));
                    }
                } else {
                    // ONLY ONE NODE OF ITS KIND
                    $node->appendChild(self::convert($key, $value));
                }
                unset($arr[$key]); //remove the key from the array once done.
            }
        }
 
        // after we are done with all the keys in the array (if it is one)
        // we check if it has any text value, if yes, append it.
        if(!is_array($arr)) {
            $node->appendChild($xml->createTextNode(self::bool2str($arr)));
        }
 
        return $node;
    }
 
    /*
     * Get the root XML node, if there isn't one, create it.
     */
    private static function getXMLRoot(){
        if(empty(self::$xml)) {
            self::init();
        }
        return self::$xml;
    }
 
    /*
     * Get string representation of boolean value
     */
    private static function bool2str($v){
        //convert boolean to text value.
        $v = $v === true ? 'true' : $v;
        $v = $v === false ? 'false' : $v;
        return $v;
    }
 
    /*
     * Check if the tag name or attribute name contains illegal characters
     * Ref: http://www.w3.org/TR/xml/#sec-common-syn
     */
    private static function isValidTagName($tag){
        $pattern = '/^[a-z_]+[a-z0-9\:\-\.\_]*[^:]*$/i';
        return preg_match($pattern, $tag, $matches) && $matches[0] == $tag;
    } 
	
	/*
     * Convert xml string into array.
     */
    public static function XML_TO_ARR($xmlstring)
	{
		$xml = simplexml_load_string($xmlstring, "SimpleXMLElement", LIBXML_NOCDATA);
		$json = json_encode($xml);
		$array = json_decode($json,TRUE);
		return $array;
    }
}
?>

2. Now Include the class

<?php

include 'Array2XML.php';//include with path to your class file 'Array2XML'

?>

3. Defining Array or get it from database then call the createXML method for generating xml file

$data_array = array(
    '@attributes' => array(
        'type' => 'fiction'
    ),
    'book' => array(
        array(
            '@attributes' => array(
                'author' => 'Jeetendra Singh'
            ),
            'title' => 'Learning PHP programming',
            'price' => 'Free'
        ),
        array(
            '@attributes' => array(
                'author' => 'Shailesh Verma'
            ),
            'title' => 'Linux Aspects',
            'price' => '$15.61'
        ),
        array(
            '@attributes' => array(
                'author' => 'Eric Basendra'
            ),
            'title' => 'IOS Dev',
            'Company' => 'Oxilo India',
            'price' => array(
                '@attributes' => array(
                    'discount' => '10%'
                ),
                '@value' => '$18.00'
            )
        )
    )
);

Now Call createXML method as following

  $root_node="data";//root node of the xml tree like//root , data or anything you want to make super parent tag for the xml
  $xml = Array2XML::createXML($root_node, $data_array);//
  
  $xml_STR = $xml->saveXML();// put string in xml_STR
  $xml->save('array_to_xml_convert.xml'); // save data in array_to_xml_convert.xml file

B. Steps for Convert Xml to Array

1. Define the xml oe get the xml string into a varribale

$xmlstring='<?xml version="1.0"?>
<x>
  <hello>4</hello>
  <var name="the-name" attr2="something-else">
    <n0>first</n0>
    <n1>second</n1>
    <n5>fifth</n5>
    <sub x="4.356" y="-9.2252">
      <n0>sub1</n0>
      <n1>sub2</n1>
      <n2>sub3</n2>
    </sub>
  </var>
  <foo>1234</foo>
</x>';

Or

$xmlstring=file_get_contents('myxml_file_path.xml');//get the string load into a varriable using 
file_get_contents method of php

2.Now call the XML_TO_ARR function as following

$Array_Data = Array2XML::XML_TO_ARR($xmlstring);//pass the xml string 
print_r($Array_Data);//print your array

[viraldownloader id=138 text=’DOWNLOAD COMPLETE CODE’]

Progress bar for php form post , Download the Code

Hi Geeks,
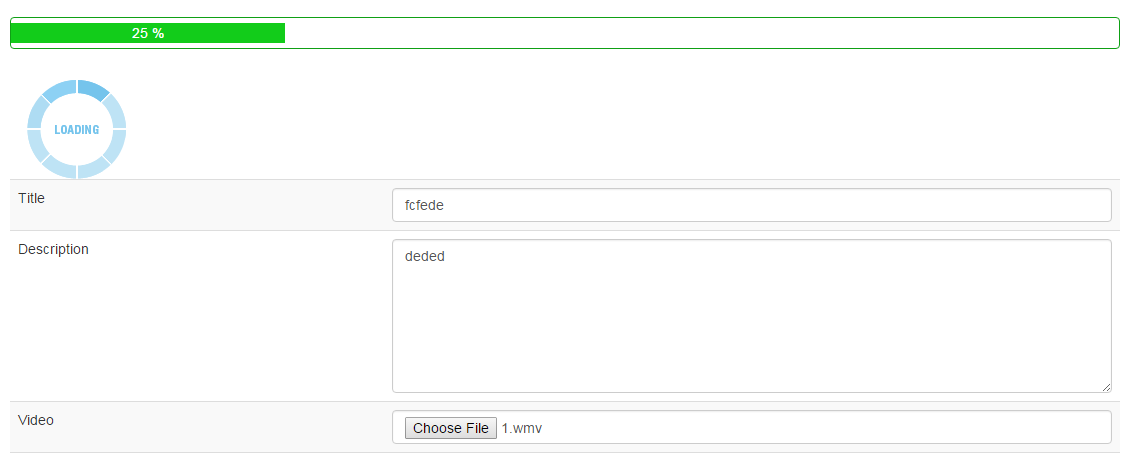
Now php has a feature for tracking the progress of multipart form submit. we can show the progress in percentage for user convenience .you can download the source code if you want to create progress bar in php form.
Following are the steps to create a progress bar for php form post.
Step 1. Add script and css for upload progress functionality working

<!--script & css required for form upload progress code-->
<script type="text/javascript" src="jquery.min.js"></script>
<script type="text/javascript" src="upload_script.js"></script>
<script type="text/javascript" src="form.min.js"></script>
<link rel="stylesheet" href="upload_progress.css" />
<!--script required for form upload progress code-->

Step 2. Form Tag should look like

<form id="myform" method="post"  enctype="multipart/form-data" action="upload.php">

Note: form id we have used myform so if you want to change the form id then you need to change in upload_script.js file also

Step 3. Add the placement for showing progress bar

<!--progress bar html code -->
<div id="progress-div"><div id="progress-bar"></div></div>
<div id="targetLayer"></div>
<div id="loader-icon" style="display:none;"><img src="ajax-loader.gif" /></div>
<!--progress bar html code -->

Step  4. In your upload or form post action you can add your code for demo purpose we have use as following:

<?php 
if(isset($_POST['title']))
{
	$title=$_POST['title'];
	$desc=$_POST['desc'];
	
	$filename=uniqid("file_attach_").$_FILES['file_upload']['name'];
	
	move_uploaded_file($_FILES['file_upload']['tmp_name'],"./uploads/".$filename);
	
	$flag=file_exists("./uploads/".$filename);
	
	/* check if file uploaded successfully */
	if($flag){
		/* make your db connection or use existing connected db */
		$con=mysql_connect("localhost","root","");
		mysql_select_db("progress_db");
		/*now insert the details in table */
		$insert_statement="insert into upload_table set `title`='".$title."',`description`='".$desc."',`file_name`='".$filename."' ";
		
		mysql_query($insert_statement);
		
		echo "Form processed Completely";
	}
	else
	{
		echo "Some Error occured";
	}


}
?>

[viraldownloader id=126 text=’Download the Source code by sharing us on facebook.’]

Text to Image Convert using php code . Download source Code

Hi Geeks,
In this tutorial we will learn that how to Create and save dynamic image in php using gd library or Text to Image Convert using php code . in this example we have a requirement to create a image with specific width and height and specific background and watermark also.
So that we have created a PHP Class to generate and save the image to specific folder or path.
please follow the steps to achive this task.
Step 1. Create a class file for generate image with name class.img.php with following code:

<?php
class IMG_PROCESS{

var $_font1="";
var $_font2="";
var $_font_size="";
var $_font_size_watermark="";

public function __construct($font_1,$font_2,$font_size="40",$font_size_watermark="15")
{
	$this->_font1=$font_1;
	$this->_font2=$font_2;
	$this->_font_size=$font_size;
	$this->_font_size_watermark=$font_size_watermark;
	
}

public function imagettftext_cr(&$im, $size, $angle, $x, $y, $color, $fontfile, $text)
{
	// retrieve boundingbox
	$bbox = imagettfbbox($size, $angle, $fontfile, $text);
	// calculate deviation
	$dx = ($bbox[2]-$bbox[0])/2.0 - ($bbox[2]-$bbox[4])/2.0;         // deviation left-right
	$dy = ($bbox[3]-$bbox[1])/2.0 + ($bbox[7]-$bbox[1])/2.0;        // deviation top-bottom
	// new pivotpoint
	$px = $x-$dx;
	$py = $y-$dy;
	return imagettftext($im, $size, $angle, $px, $y, $color, $fontfile, $text);
}

public function generate_img($name,$savepath,$size_arr,$watermark,$rgb=array("34","96","76"))
{
 
     
$image = imagecreate($size_arr['width'],$size_arr['height']);
$rgb_background = imagecolorallocate($image,$rgb[0],$rgb[1],$rgb[2]);
$grey_shade = imagecolorallocate($image,40,40,40);
$white = imagecolorallocate($image,255,255,255);


// Local font files, relative to script
$otherFont = $this->_font1;
$font = $this->_font2;

 
$i=0;
while($i<10){
$this->imagettftext_cr($image,12,$this->_font_size_watermark,rand(100,500),rand(200,500),$grey_shade,$otherFont,$watermark);
$i++;
}

// Main Text

$w=$size_arr['width'] / 2 ;
$h=$size_arr['height'] / 2 ;

$this->imagettftext_cr($image,$this->_font_size,0,$w,$h,$white,$font,$name);
$this->imagettftext_cr($image,$this->_font_size_watermark,0,$w,$h+30,$white,$otherFont,$watermark);
imagejpeg($image,$savepath);

}

}
?>

Step 2. make another php file with any name.
and include the class file as follow:

<?php
include 'class.img.php';//include class file for generate image
?>

Now create a instance of img class with font file names and sizes as following :

<?php
$font_file1="fonts/arial.ttf";
$font_file2="fonts/times.ttf";
$font_size="40";
$font_size_watermark="15";
?>

Init with font files and font sizes as follow:

<?php
$img_obj=new IMG_PROCESS($font_file1,$font_file2,$font_size,$font_size_watermark);
?>

Now generate a single image as follow:

<?php
	$text_to_image="THIS IS MY TEXT";//
	$size_arr=array("width"=>"500","height"=>"500"); //define height and width
	$savepath="images/my_image_test.jpg";
	$watermark="w3school test";
	$rgb=array("0","0","0");//define a black rgb scheme
	$img_obj->generate_img($text_to_image,$savepath,$size_arr,$watermark,$rgb); //call the generate image 
?>

Generate multiple images in loop as following code :

<?php
$text=array("MY IMAGE TEXT 1","MY IMAGE TEXT 2","MY IMAGE TEXT 3","MY IMAGE TEXT 4","MY IMAGE TEXT 5",);
foreach($text as $title)
{
	 
	//
	$img_name=strtolower(str_replace(" ","-",$title));
	$size_arr=array("width"=>"1366","height"=>"768"); //define height and width
	$savepath="images/".$img_name.".jpg";
	$watermark="w3school test watermark";
	$rgb=array("34","96","76");//define a light green rgb scheme
	$img_obj->generate_img($title,$savepath,$size_arr,$watermark,$rgb); //call the generate image function
	// 
 
	
}
?>

Complete Code of above snippets:

<?php 
include 'class.img.php';//include class file for generate image

//now create a instance of img class with font file names and sizes as following 
$font_file1="fonts/arial.ttf";
$font_file2="fonts/times.ttf";

$font_size="40";
$font_size_watermark="15";

$img_obj=new IMG_PROCESS($font_file1,$font_file2,$font_size,$font_size_watermark); //init with font files and font sizes

//now generate a single image  

	$text_to_image="THIS IS MY TEXT";//
	$size_arr=array("width"=>"500","height"=>"500"); //define height and width
	$savepath="images/my_image_test.jpg";
	$watermark="w3school test";
	$rgb=array("0","0","0");//define a black rgb scheme
	$img_obj->generate_img($text_to_image,$savepath,$size_arr,$watermark,$rgb); //call the generate image 


//now generate a single image  


//generate multiple images in loop

$text=array("MY IMAGE TEXT 1","MY IMAGE TEXT 2","MY IMAGE TEXT 3","MY IMAGE TEXT 4","MY IMAGE TEXT 5",);
foreach($text as $title)
{
	 
	//
	$img_name=strtolower(str_replace(" ","-",$title));
	$size_arr=array("width"=>"1366","height"=>"768"); //define height and width
	$savepath="images/".$img_name.".jpg";
	$watermark="w3school test watermark";
	$rgb=array("34","96","76");//define a light green rgb scheme
	$img_obj->generate_img($title,$savepath,$size_arr,$watermark,$rgb); //call the generate image function
	// 
 
	
}

//generate multiple images in loop

?>

[viraldownloader id=113 text=’Download the Complete Code by Sharing this post and click on generate button after sharing’]

Note: please confirm GD library on your php server. and create a images folder in project with 755 or 775 or 777 permissions.