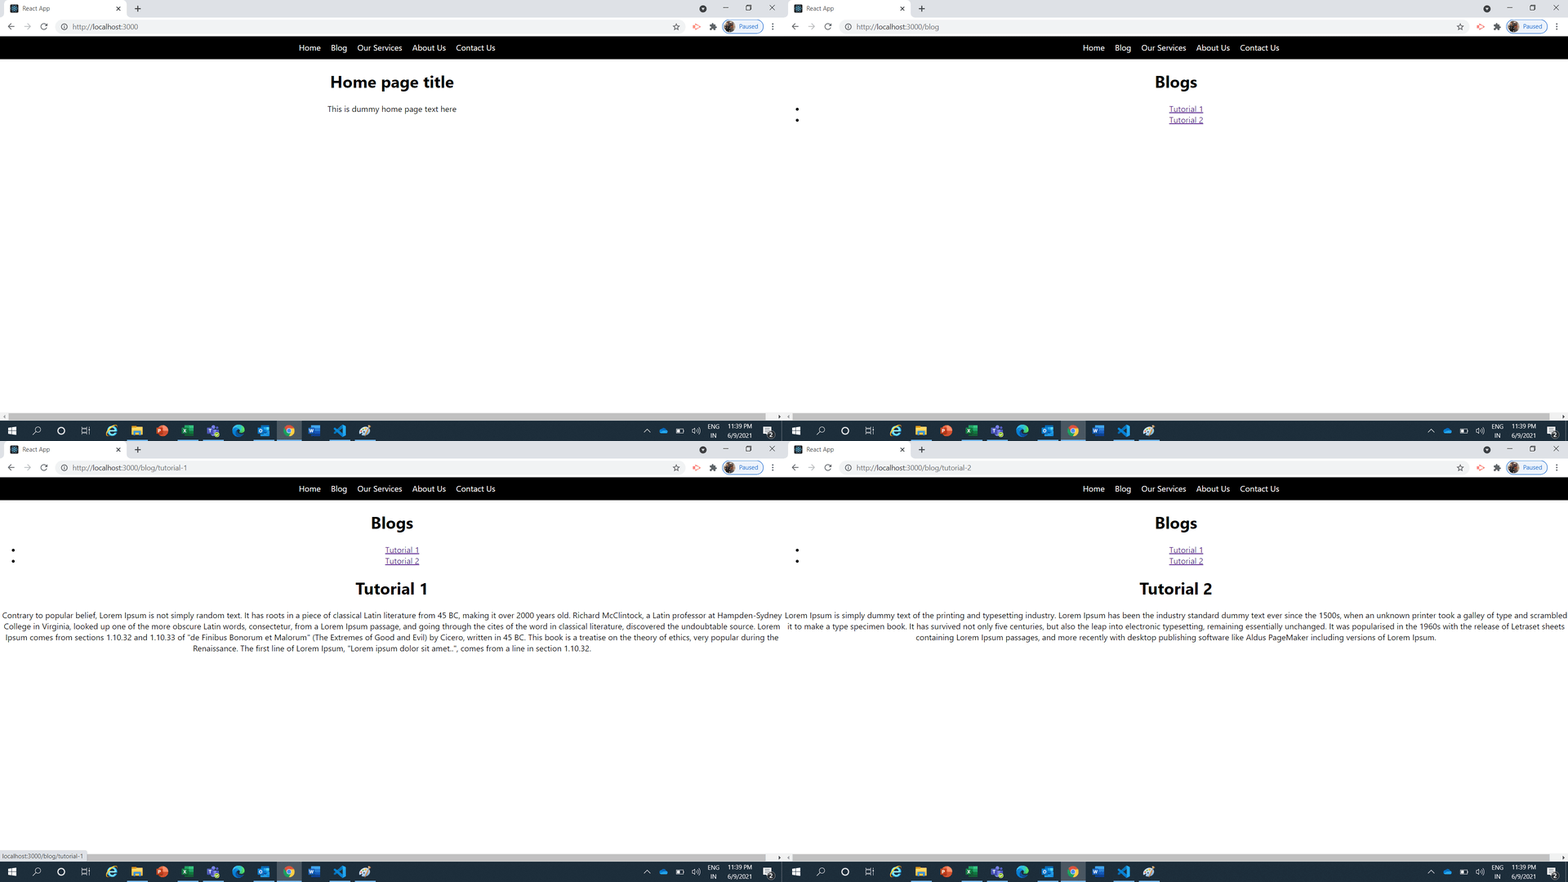
In this blog we will understand Nested Routing in React. First we will discuss the Nested routing and its use cases.
Suppose we have a Blog Page where all blogs will be listed and if user clicked on any blog link the its details page needs to open under blog
as parent slug with its title.
for Example, Blog Page Url is : http://localhost/blog
is will list all of the blog titles like this :
Tutorial 1
or
Tutorial 2
and if we click on these titles then url would be like this :
http://localhost/blog/tutorial-1
or
http://localhost/blog/tutorial-2
and these url are basically nested urls as both of them comes under /blog scheme so this kind of scenarios can be handled via nested routing.
So let’s get started :
In our Exiting App.jsx, Add a menu for Blog after Home menu :
|
1 2 3 4 5 6 7 8 9 10 11 12 13 14 15 16 17 18 19 20 21 22 |
const menuData = [ { title: "Home", url: "/" }, { title: "Blog", url: "/blog" }, { title: "Our Services", url: "/page/services" }, { title: "About Us", url: "/page/about" }, { title: "Contact Us", url: "/page/contact" } ] |
Note: Here the menuData was already presented (in previous Routing Blog), We have just added Blog after Home.
here we have added 1 more menu named Blog after Home
Create a Route for Blog In Exiting Switch
|
1 2 3 |
<Route path="/blog"> <Blog /> </Route> |
Note : as of now we dont have Blog component so we will create it in next step.
Now Create a Blog Component named Blog.js which uses Nested Routing in React :
|
1 2 3 4 5 6 7 8 9 10 11 12 13 14 15 16 17 18 19 20 21 22 23 24 25 |
import { Link, Route, Switch, useRouteMatch } from "react-router-dom"; import Detail from "./Detail"; const Blog = () => { let match = useRouteMatch(); return ( <div> <h1>Blogs</h1> <ul> <li> <Link to={`${match.url}/tutorial-1`}>Tutorial 1</Link> </li> <li> <Link to={`${match.url}/tutorial-2`}>Tutorial 2</Link> </li> </ul> <Switch> <Route path={`${match.path}/:slug`}> <Detail /> </Route> </Switch> </div> ); } export default Blog; |
In above code we are using useRouteMatch to read the current matched url means it is reading till /blog of the url that is current route and we have create 1 new switch with following route :
|
1 2 3 |
<Route path={`${match.path}/:slug`}> <Detail /> </Route> |
So its means if we get any other slug after current slug (/blog), then that should load the component Detail(this component we will create in next step.)
So basically we have created a nested route in blog route in Blog Component itself.
Now lets create a Detail Component named Detail.js like this :
|
1 2 3 4 5 6 7 8 9 10 11 12 13 14 15 16 17 18 19 20 21 22 23 24 25 26 |
import { useParams } from "react-router-dom"; const Detail = () => { const blogData=[ { slug:'tutorial-1', title:'Tutorial 1', details:'Contrary to popular belief, Lorem Ipsum is not simply random text. It has roots in a piece of classical Latin literature from 45 BC, making it over 2000 years old. Richard McClintock, a Latin professor at Hampden-Sydney College in Virginia, looked up one of the more obscure Latin words, consectetur, from a Lorem Ipsum passage, and going through the cites of the word in classical literature, discovered the undoubtable source. Lorem Ipsum comes from sections 1.10.32 and 1.10.33 of "de Finibus Bonorum et Malorum" (The Extremes of Good and Evil) by Cicero, written in 45 BC. This book is a treatise on the theory of ethics, very popular during the Renaissance. The first line of Lorem Ipsum, "Lorem ipsum dolor sit amet..", comes from a line in section 1.10.32.' }, { slug:'tutorial-2', title:'Tutorial 2', details:'Lorem Ipsum is simply dummy text of the printing and typesetting industry. Lorem Ipsum has been the industry standard dummy text ever since the 1500s, when an unknown printer took a galley of type and scrambled it to make a type specimen book. It has survived not only five centuries, but also the leap into electronic typesetting, remaining essentially unchanged. It was popularised in the 1960s with the release of Letraset sheets containing Lorem Ipsum passages, and more recently with desktop publishing software like Aldus PageMaker including versions of Lorem Ipsum.' } ] const {slug} = useParams(); const pageData = blogData.find(r=>r.slug===slug) return ( <div> <h1>{pageData.title}</h1> <div> {pageData.details} </div> </div> ) } export default Detail; |
In this component we are using useParams() hook to read the available parameters in url, and we are reading slug and finding in our data with that slug and showing the relevant details.
let see how our application looks like now :

Hope you understand the routing to download the full source code please click here.
If you face any issues then let me know in comments section. also suggestions are most welcome.


